
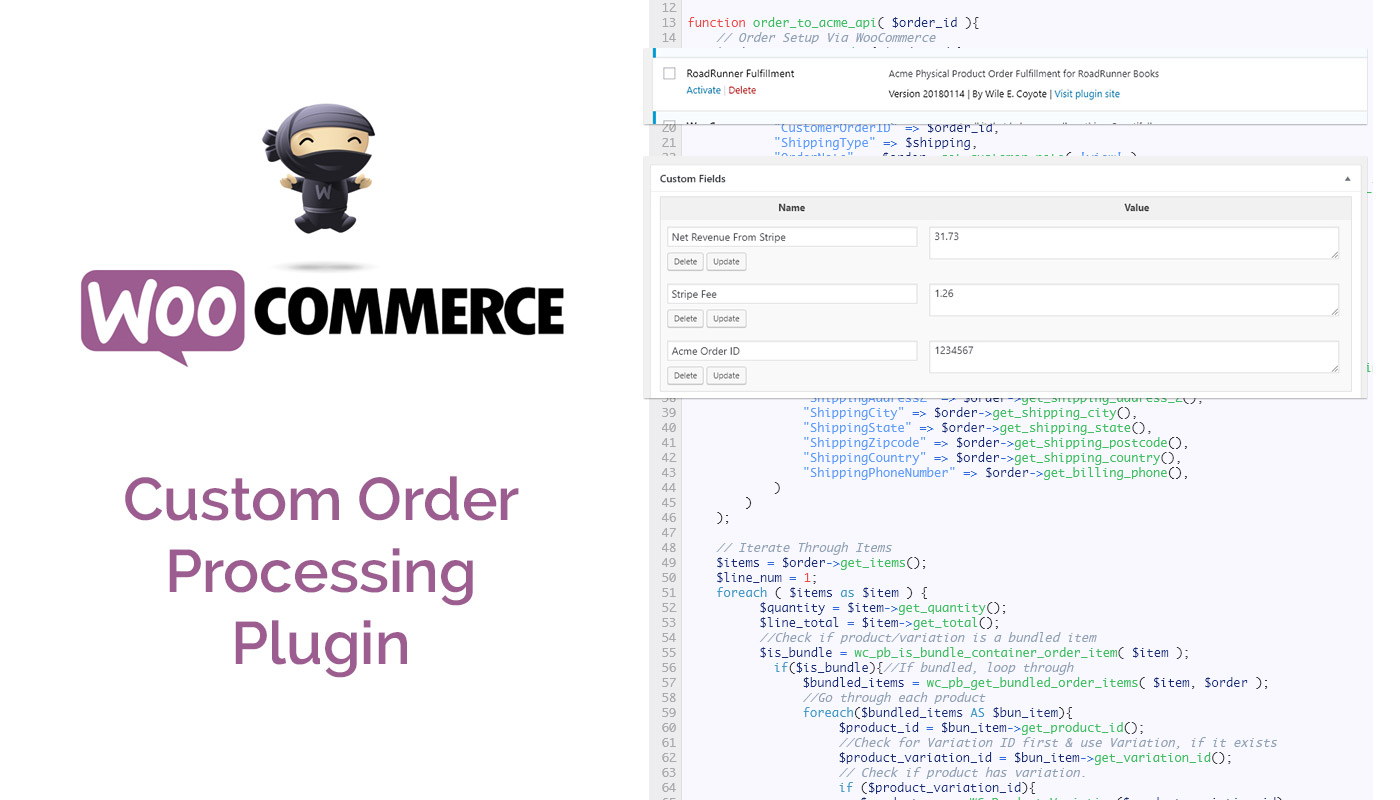
WooCommerce, built as a plugin for WordPress, is an incredibly powerful software tool on its own. The front end is well done, and you will find it familiar if you’ve used WordPress before. But when you want to do something beyond the essential functionality, it can be more than a little frustrating to figure out the right way to do it. Multiple versions, deprecated functions, and a new REST API that makes things simpler, but way less convenient, can make searching the web for answers take forever.
I was recently tasked with building a custom plugin to integrate a WooCommerce shop (let’s call the shop Roadrunner Books) with a fulfillment house (we’ll call them Acme Fulfillment). Acme had a bare-bones API and no pre-existing WooCommerce integration, so my job was to:
- Intercept a paid WooCommerce order on Roadrunner’s website
- Determine if the product(s) purchased needed to be sent to Acme for shipping
- Send the products and the shipping details to Acme
This sounds fairly simple, but add to the mix that RoadRunner only needed to send certain items to Acme (just books) and all eBooks and other products were fulfilled elsewhere. Plus, their store utilized Variable products and Product Bundles. And, the response from Acme’s API needed to be saved to WooCommerce so Customer Service representatives could see the Acme Order Numbers.
Step 1: Build the Plugin
Making a WordPress plugin is not as intimidating as it seems. You need a few required elements, and the rest is just like any other custom WordPress code that you might put into the functions.php file. Plugins don’t actually have to have a front-end in the WordPress Dashboard or be listed in the Plugin shop. Custom plugins are just a cleaner, simpler way to include custom code into your WordPress website.
Start With a Unique Name
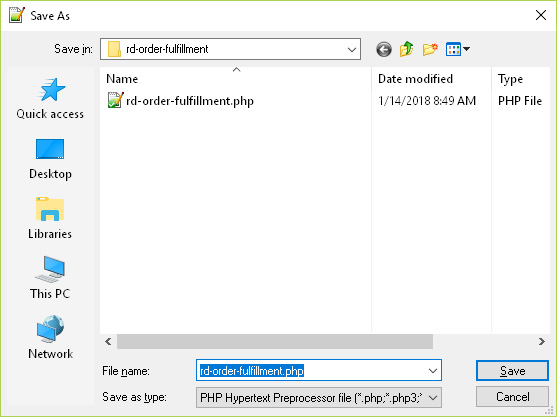
If you use a name that already exists in the WordPress plugin shop, your plugin will trigger automatic updates from THAT plugin, overwriting your plugin if someone clicks “update.” To avoid this, prefix your plugin’s name with a sensible term or initials. In my case, I will use “rd” for Roadrunner, and name my plugin “rd-order-fulfillment” so I can easily tell its purpose.
Create a Folder and File With That Unique Name
Add the Required Header
/*
Plugin Name:  RoadRunner Fulfillment
Plugin URI:   https://mwoodruff.net/articles/woocommerce-fulfillment-plugin
Description:  Acme Physical Product Order Fulfillment for RoadRunner Books
Version:      20180114
Author:       Wile E. Coyote
*/
...
You can also a bit of security to your plugin with this line of code, to keep folks from traversing your plugin with bots:
>defined( 'ABSPATH' ) or die( 'No script kiddies please!' );
Install Your Custom Plugin

If your plugin code created above is in the wp-content/plugins directory, you should be able to log into your store and see your new plugin listed. Activate it so that you can test using it.
Step 2: Catch the Orders with a WooCommerce Hook
Now that we have a plugin, we should have it do some stuff, right? Since we want to run our plugin when someone successfully completes an order, we need to use a WooCommerce hook to catch the process. There are many points in the order process we can hook into, but we want to grab data when a payment is complete: we don’t want to ship prodto ucts unless we have accepted payment from our customer.
add_action( 'woocommerce_payment_complete', 'order_to_acme_api');
function order_to_acme_api( $order_id ){

}
The hook will call our function, and from there we can access the order object’s details. Here are some fields we will need to tell Acme where to send the products, and how to ship them:
// Order Setup Via WooCommerce
    $order = new WC_Order( $order_id );
	$shipping = $order->get_shipping_method();
	$order_api_fields = array(
		"clientID" => "WCoyote",
		"Order" => array(
			"CustomerOrderID" => $order_id,
			"ShippingType" => $shipping,
			"OrderNote"	=> $order->get_customer_note( 'view' ),
			"BillingInformation" => array(
				"BillingName" => $order->get_billing_first_name() . " " . $order->get_billing_last_name(),
				"BillingCompany" => "",
				"BillingAddress1" => $order->get_billing_address_1(),
				"BillingAddress2" => $order->get_billing_address_2(),
				"BillingCity" => $order->get_billing_city(),
				"BillingState" => $order->get_billing_state(),
				"BillingZipcode" => $order->get_billing_postcode(),
				"BillingCountry" => $order->get_billing_country(),
				"BillingPhoneNumber" => $order->get_billing_phone(),
				"BillingEmail" => $order->get_billing_email()
			),
			"ShippingInformation" => array(
				"ShippingName" => $order->get_shipping_first_name() . " " . $order->get_shipping_last_name(),
				"ShippingAddress1" => $order->get_shipping_address_1(),
				"ShippingAddress2" => $order->get_shipping_address_2(),
				"ShippingCity" => $order->get_shipping_city(),
				"ShippingState" => $order->get_shipping_state(),
				"ShippingZipcode" => $order->get_shipping_postcode(),
				"ShippingCountry" => $order->get_shipping_country(),
				"ShippingPhoneNumber" => $order->get_billing_phone(),
			)
		)
	);
Step 3: Working with Variable Products and Bundles
Acme needs product SKU values to fulfill orders. In some stores, that’s as simple as $sku = $product->get_sku();, but RoadRunner utilizes variable products (where there are multiple options for a product, like a paperback and eBook version of one book) and Product Bundles (a custom WooCommerce extension that lets you put groups of products together and offer them for a set price, like 3 books all about the Sonoran Desert as a “Sonoran Study Bundle”). Acme doesn’t know about our variable products or bundles—they only need to know what actual products need to be shipped to a customer. That means we need to find the right SKUs to send.
Annoyingly, the Product Bundles plugin adds our bundles to our order twice: once as the Bundle, and then second as each individual item. You’d think we need to ignore the bundle and just process the individual items, but because we need the details of the bundle as a line item, we actually get the most accurate information from traversing the bundle instead, and then ignoring the individual items as we get to them in the larger loop.
Traversing the bundle
// Iterate Through Items
    $items = $order->get_items();
    $line_num = 1;
    foreach ( $items as $item ) {
          $quantity = $item->get_quantity();
          $line_total = $item->get_total();
          //Check if product/variation is a bundled item
          $is_bundle = wc_pb_is_bundle_container_order_item( $item );
            if($is_bundle){//If bundled, loop through
                $bundled_items = wc_pb_get_bundled_order_items( $item, $order );
                //Go through each product
                foreach($bundled_items AS $bun_item){
                     $product_id = $bun_item->get_product_id();
                    ...
Then we need to check each bundled item for its variation id. If it has a variation_id, then that is the SKU we want to use. Otherwise, the product’s SKU is the right (and only) one.
...
                    //Check for Variation ID first & use Variation, if it exists
                     $product_variation_id = $bun_item->get_variation_id();
                     // Check if product has variation.
                     if ($product_variation_id){
                        $product = new WC_Product_Variation($product_variation_id);
                     }else{
                        $product = $bun_item->get_product();
                     }
...
What about the singleton (non-bundled) products? Those will be processed as the “else” in the if($is_bundle){ call above. We just need to make sure the item is NOT a bundle child (since those are dealt with in the loop above).
...
}else{//process a single product
                //Have to check that this is not a bundled item (those are processed above in terms of the bundle)
                $is_bundle_child = wc_pb_is_bundled_order_item( $item, $order );
                if(!$is_bundle_child){
                    $product_id = $item->get_product_id();
                    error_log("Product ID NOT in Bundle:" . $product_id);
                     //Check for Variation ID first & use Variation, if it exists
                     $product_variation_id = $item->get_variation_id();
                     // Check if product has variation.
                     if ($product_variation_id){
                        $product = new WC_Product_Variation($product_variation_id);
                     }else{
                        $product = $item->get_product();
                     }
...
Step 4: Filtering Products by a Custom Attribute
Some of our products are not fulfilled by Acme—our eBooks, for instance, are delivered to the customer with their order confirmation page and email—so we do not want to send those product SKUs to Acme. We need to filter our products by an attribute, and we have a custom attribute called “Format” that is perfect for this task.
We have three Formats of products in RoadRunner’s WooCommerce store: Paperback, Hardcover, and eBook. Only the Paperback and Hardcover books should be sent to Acme’s API. We need to access the custom attribute “Format” to determine if we send or not for each product. In our case, since we have to run through the products in two ways (bundled & not-bundled) already, I made the Format check a separate function to be called. If the function returns false, then we know the product is an eBook and we should not send it to Acme.
Function being called on each product:
    $post_data = process_product($product,$quantity,$line_total,$line_num);
    if($post_data){
                        //Add to Products in Array
                        $order_api_fields['Order']['Products'][] = $post_data;
                        $line_num++;
                        }
Function to filter by custom attribute, Format in this case:
function process_product($product,$quantity,$line_total,$line_num){
	$sku = $product->get_sku();
	$format = $product->get_attribute( 'Format' );
	//Check for does *not* contain "eBook"
	if(stripos($format,"eBook")===false){
		$single_item = array();
			//assemble single product details
			$single_item['LineNumber'] = $line_num;
			$single_item['ProductSKU'] = $sku;
			$single_item['Qty'] = $quantity;
			$single_item['Price'] = $line_total;
		return $single_item;
	}else return false;
}//end process_product()
Step 5: POST Products to Acme
We could use a regular PHP cURL to send our data to Acme, but WordPress has a nice little function that keeps things neat and tidy. We need to check before we do anything, however, that we actually have products to send to Acme.
if(isset($order_api_fields['Order']['Products'][0])){
Then, with this API, we need to authenticate using custom headers.
        //Authenticate (get token)
        $auth_url = "https://acmefulfillment.com/api/authenticate";;
        $headers = array(
            'X-Auth-Username' => '12345ABCDE',
            'X-Auth-Password' => '000-111-222-3333',
            'Accept' => 'application/json'
        );

            $response = wp_remote_post( $auth_url,
                array(
                    'headers' => $headers,
                        'method' => 'POST',
                        'timeout' => 75,
                        'body' => "",
                        'httpversion' => '1.0'
                    )
                );
                if ( is_wp_error( $response ) ) {
                    $errorResponse = $response->get_error_message();
                    error_log("Error Message Acme Auth:" . print_r($errorResponse,true));
                }
                $auth = json_decode($response['body'],true);
                $token = $auth['token'];
Next, we can send our formatted data.
       $url = "https://acmefulfillment.com/api/order";
        $headers_item = array(
            'X-Auth-Token' => $token,
            'Content-Type' => 'application/json'
        );
        $response = wp_remote_post( $url,
                array(
                    'headers' => $headers_item,
                        'method' => 'POST',
                        'timeout' => 75,
                        'body' => json_encode($order_api_fields),
                        'httpversion' => '1.0'
                    )
                );
                if ( is_wp_error( $response ) ) {
                    $errorResponse = $response->get_error_message();
                    error_log("Error Message Acme Order: " . print_r($errorResponse,true));
                }else error_log("Successful Acme Order ID: " . $response['body']);
Step 6: Save Acme’s Details in WooCommerce’s Order Object
In the response we get from Acme above, we used the PHP Error Log to see the Acme Order Number from their system for successful POSTs. We should record this value so that if any Customer Service issues arise, we can refer to this Order Number in the WooCommerce Order interface to ask Acme questions. We can use the update_meta_data() function to do this:
 $order->update_meta_data( 'Acme Order ID', $response['body'] );
 $order->save();
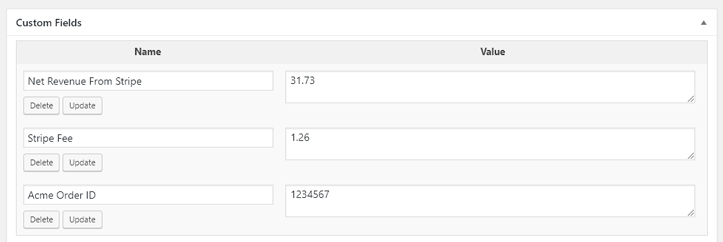
Now, in the Order page, our Customer Service reps can easily see the Acme Order ID:
Final Step: Putting it all Together
/*
Plugin Name:  RoadRunner Fulfillment
Plugin URI:   https://mwoodruff.net/articles/woocommerce-fulfillment-plugin
Description:  Acme Physical Product Order Fulfillment for RoadRunner Books
Version:      20180114
Author:       Wile E. Coyote
*/
defined( 'ABSPATH' ) or die( 'No script kiddies please!' );

add_action( 'woocommerce_payment_complete', 'order_to_acme_api');

function order_to_acme_api( $order_id ){
	// Order Setup Via WooCommerce
	$order = new WC_Order( $order_id );
	$shipping = $order--->get_shipping_method();
	$order_api_fields = array(
		"clientID" => "WCoyote",
		"Order" => array(
			"CustomerOrderID" => $order_id,
			"ShippingType" => $shipping,
			"OrderNote"	=> $order->get_customer_note( 'view' ),
			"BillingInformation" => array(
				"BillingName" => $order->get_billing_first_name() . " " . $order->get_billing_last_name(),
				"BillingCompany" => "",
				"BillingAddress1" => $order->get_billing_address_1(),
				"BillingAddress2" => $order->get_billing_address_2(),
				"BillingCity" => $order->get_billing_city(),
				"BillingState" => $order->get_billing_state(),
				"BillingZipcode" => $order->get_billing_postcode(),
				"BillingCountry" => $order->get_billing_country(),
				"BillingPhoneNumber" => $order->get_billing_phone(),
				"BillingEmail" => $order->get_billing_email()
			),
			"ShippingInformation" => array(
				"ShippingName" => $order->get_shipping_first_name() . " " . $order->get_shipping_last_name(),
				"ShippingAddress1" => $order->get_shipping_address_1(),
				"ShippingAddress2" => $order->get_shipping_address_2(),
				"ShippingCity" => $order->get_shipping_city(),
				"ShippingState" => $order->get_shipping_state(),
				"ShippingZipcode" => $order->get_shipping_postcode(),
				"ShippingCountry" => $order->get_shipping_country(),
				"ShippingPhoneNumber" => $order->get_billing_phone(),
			)
		)
	);

	// Iterate Through Items
	$items = $order->get_items();
	$line_num = 1;
	foreach ( $items as $item ) {
		  $quantity = $item->get_quantity();
		  $line_total = $item->get_total();
		  //Check if product/variation is a bundled item
		  $is_bundle = wc_pb_is_bundle_container_order_item( $item );
			if($is_bundle){//If bundled, loop through
				$bundled_items = wc_pb_get_bundled_order_items( $item, $order );
				//Go through each product
				foreach($bundled_items AS $bun_item){
					 $product_id = $bun_item->get_product_id();
					 //Check for Variation ID first & use Variation, if it exists
					 $product_variation_id = $bun_item->get_variation_id();
					 // Check if product has variation.
					 if ($product_variation_id){
						$product = new WC_Product_Variation($product_variation_id);
					 }else{
						$product = $bun_item->get_product();
					 }
					 $post_data = process_product($product,$quantity,$line_total,$line_num);
					 if($post_data){
						//Add to Products in Array
						$order_api_fields['Order']['Products'][] = $post_data;
						$line_num++;
					 }
				}
			}else{//process a single product
				//Have to check that this is not a bundled item (those are processed above in terms of the bundle
				$is_bundle_child = wc_pb_is_bundled_order_item( $item, $order );
				if(!$is_bundle_child){
					$product_id = $item->get_product_id();
					error_log("Product ID NOT in Bundle:" . $product_id);
					 //Check for Variation ID first & use Variation, if it exists
					 $product_variation_id = $item->get_variation_id();
					 // Check if product has variation.
					 if ($product_variation_id){
						$product = new WC_Product_Variation($product_variation_id);
					 }else{
						$product = $item->get_product();
					 }
					 $post_data = process_product($product,$quantity,$line_total,$line_num);
					 if($post_data){
						//Add to Products in Array
						$order_api_fields['Order']['Products'][] = $post_data;
						$line_num++;
					 }
				}
			}
	}
	if(isset($order_api_fields['Order']['Products'][0])){

		//Authenticate (get token)
		$auth_url = "https://acmefulfillment.com/api/authenticate";
		$headers = array(
			'X-Auth-Username' => '12345ABCDE',
			'X-Auth-Password' => '000-111-222-3333',
			'Accept' => 'application/json'
		);

			$response = wp_remote_post( $auth_url,
				array(
					'headers' => $headers,
						'method' => 'POST',
						'timeout' => 75,
						'body' => "",
						'httpversion' => '1.0'
					)
				);

				if ( is_wp_error( $response ) ) {
					$errorResponse = $response->get_error_message();
					error_log("Error Message Acme Auth:" . print_r($errorResponse,true));
				}
				$auth = json_decode($response['body'],true);
				$token = $auth['token'];

		$url = "https://acmefulfillment.com/api/order";
		$headers_item = array(
			'X-Auth-Token' => $token,
			'Content-Type' => 'application/json'
		);
		$response = wp_remote_post( $url,
				array(
					'headers' => $headers_item,
						'method' => 'POST',
						'timeout' => 75,
						'body' => json_encode($order_api_fields),
						'httpversion' => '1.0'
					)
				);

				if ( is_wp_error( $response ) ) {
					$errorResponse = $response->get_error_message();
					error_log("Error Message Acme Order Submit: " . print_r($errorResponse,true));
				}else{
					$order->update_meta_data( 'Acme Order ID', $response['body'] );
					$order->save();
				}
	}//end check for products to send to Acme
}//end order_to_acme_api()

function process_product($product,$quantity,$line_total,$line_num){
	$sku = $product->get_sku();
	$format = $product->get_attribute( 'Format' );
	//Check for does *not* contain "eBook"
	if(stripos($format,"eBook")===false){
		$single_item = array();
			//assemble single product details
			$single_item['LineNumber'] = $line_num;
			$single_item['ProductSKU'] = $sku;
			$single_item['Qty'] = $quantity;
			$single_item['Price'] = $line_total;
		return $single_item;
	}else return false;
}//end process_product()
WooCommerce’s powerful engine can make for a complicated and ever-evolving code base. I hope this tutorial for a custom fulfillment integration helps you better understand the way WooCommerce works on the backend, and maybe saves you some time if this is the kind of project you’re working on right now. Meep meep!