
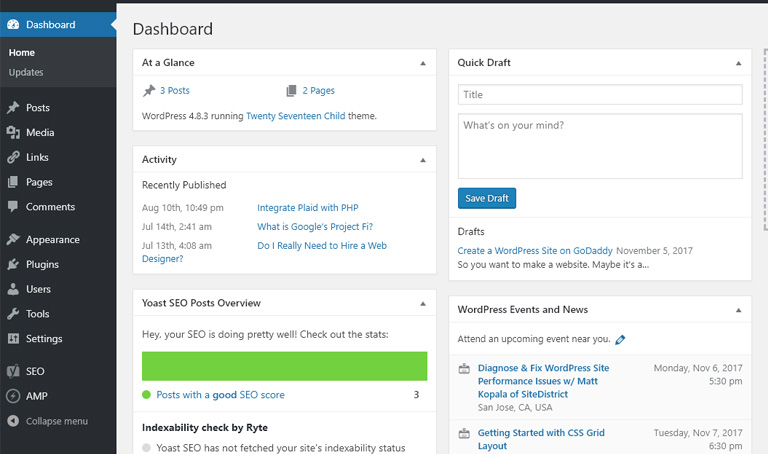
So you want to make a website. Maybe it’s a blog, or a website for your business. You’ve probably heard about WordPress for years now. Everyone seems to be using it, so you’ve decided that’s the way to go. But where do you start? This tutorial will take you step-by-step through the process of creating a WordPress Site on GoDaddy Hosting, though a lot of the instructions can be used on other platforms as well.
There is no end of ways to get yourself a WordPress Website, so it can be confusing even just to get started. I will try to explain some of the options you have, and then take you step-by-step through the most involved (but usually cheapest) option, to help you get your site going and to understand what this whole WordPress thing is about.
What is WordPress?
WordPress is a Content Management System (CMS). Basically, that means it’s a website you edit in a web browser. It has two major parts:
The Front End
This is the actual website visitors to your domain will see. Everyone can see it. It should be attractive and easy-to-use. Luckily, there are lots of themes out there to help you with that.
The Back End or Admin Dashboard
This is the part only you and other people working on your site will see. You will use it to post content, edit content, and work on the design and settings for your WordPress website. It is password protected.
In a nutshell: your WordPress website is software that uses a database to show content at a web address.
The Many Ways to WordPress
WordPress websites need to be hosted on a server that uses the PHP programming language and a database. Luckily, most hosting options out there offer those exact things!
There are different options for hosting:
- WordPress.com. They offer free and low-cost plans. This is best for personal blogs and non-commercial sites. Unless you spring for the highest-level plan, your access to the core of WordPress will be very limited, so also assume you will be using your site as-is, with little customization. My tutorial as it follows will probably NOT look like what is provided at WordPress.com.
- WordPress-only hosting. These are hosting companies that specialize in WordPress, like WPEngine. I have listed out the pros and cons of a few of these in another article.
- Regular web hosting. This is the option that gives you full control, but also means a little more work. However, I like the flexibility of managing my own hosting, because it means I can host multiple sites on one plan, and I don’t hit a wall–there’s nothing I CAN’T do. I really like GoDaddy, and have been using them to host mine and my clients’ sites for many years. I go into more detail in another article and I highly recommend them. The tutorial below is specifically using their hosting and their WordPress automatic installer.
Please note: This article contains affiliate links. This means some of the links to other websites will provide some compensation if you purchase from them.
Step 1: Purchase Hosting and a Domain
WordPress is not anything out of the ordinary as far as technology goes—it uses PHP and MySQL (a DB querying language), and any basic hosting plan can handle that. GoDaddy offers both WordPress Hosting and Web Hosting, so you have to choose one.
What is the difference between GoDaddy WordPress Hosting and Web Hosting?
GoDaddy’s WordPress Hosting
This option removes some extraneous steps from the installation process, as well as access to cPanel (more on that later) and disallows the installation of plugins that they have blacklisted. You get easier setup with less control. As of this writing, pricing starts at $3.99/month when on sale (which is nearly always) and $7.99 when not. A free domain is included.
GoDaddy’s Web Hosting
This is a normal hosting account you could use to do any kind of website, including WordPress. You have more access, but that can be dangerous if you don’t know what you’re doing. Installing WordPress will still be easy to do, but you’ll have more opportunities to customize. As of this writing, pricing starts at $3.49/month when on sale (which is nearly always) and $7.99 when not. A free domain is included.
The pricing rates are similar, and while I (a Web Developer) would never choose a limited plan like the WordPress Hosting for myself, I think it is a perfect option for someone who doesn’t want to deal with extra work they can avoid, while still fully achieving their goals for a blog or website.
When Purchasing your Plan:
- You may think your blog or business website doesn’t need an SSL Certificate (the way you secure a website, and get to use “https://” instead of “http://”) because you don’t sell anything or collect personal information or credit cards. This is no longer true, as Google has made a point of encouraging the web to be more secure. This means sites that are not secured will never rank as high in search results as sites that are secure. If you think Google web search will be important for your site’s traffic, be sure to secure your site.That being said, you can get free SSL through Cloudflare but it will be more complicated than using the automated system on GoDaddy or other hosts. Also, the “free” year of SSL from GoDaddy will expire, and when it does, you will need to cough up $69.99 to keep that convenient SSL Cert.
- You can always change plans later. It’s not pretty, but you CAN move a WordPress site, and GoDaddy has great customer support if you have questions. They always seem to want to help you save money.
- Read the offers GoDaddy throws at you when you’re purchasing carefully. I never get any of them, and you probably shouldn’t either. You can always add something on later, so I recommend skipping offers for now. The one exception to that rule is Site Backup & Restore. Right now this add-on is $1.99/month and, if you are in the “I’d rather have someone else deal with it” camp, means no work for you to ensure you can recover a broken or hacked site.
- When you purchase regular Hosting on GoDaddy, it may ask you if you plan to create a WordPress site. This should install WordPress for you, but in my experience, it results in a failed install and you have to install WordPress yourself anyway. Skip it!
When purchasing, you will get to pick that free domain. Have the domain you want ready in your head, because you will have to pay for any other domain you buy later if you come to dislike the one you got. When picking a domain, the general consensus is that .com is better than everything else, shorter is better, and make sure a domain with a bunch of words together doesn’t look like something unintended (the famous example of this is the website for Pen Island, i.e. www.penisland.com).
Step 2: Auto install WordPress w/Installatron
Note: If you are using GoDaddy or another host’s dedicated WordPress hosting, you can skip this step, since you should start with a fully installed WordPress site right away.
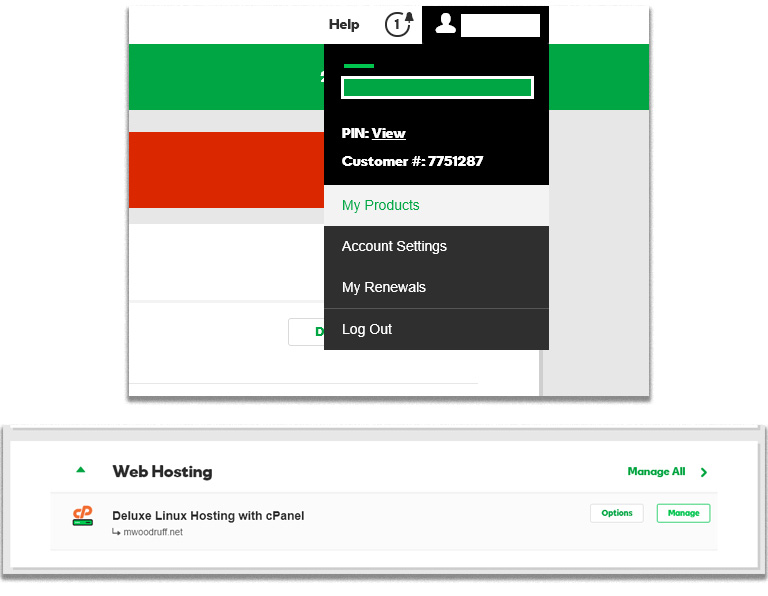
When logged into GoDaddy, navigate to your cPanel by clicking your name, then My Products. Scroll down to Web Hosting, then selecting Manage, then click on your site. Note: This is accurate as of this writing, but the layout may change. The keywords should stay the same.
CPanel has a ton of options, which can be great or overwhelming. Luckily, you know what you want to do—you want to install WordPress, and you are going to use an automated process to do it. In the top section of cPanel, where it says Your Build Tools, you should see a logo and the word “Installatron Applications Installer.” Click that. If you don’t see that link up at the top, scroll down to the Software section and find it there.
In Installatron, you will see many applications you can choose from, but WordPress is under the heading Apps for Content Management. Click WordPress, and on the next page, click install this application.
If you plan to use your WordPress site as your main site, you should be able to leave almost every field on this page as-is. The default settings will be fine for most WordPress installs, the passwords should be unnecessary since you can get to your WordPress site through GoDaddy’s cPanel in the future, and the WordPress installation will automatically update to any new versions when they become available.
The three fields you may want to change now are: Administrator Email (change this to your email), Website Title, and Website Tagline. You can also change these later, but this is so easy, why not do it now?
Scroll to the bottom and click + Install.
Should you use the Wizard?
GoDaddy has a WordPress Wizard that starts after the install. It doesn’t do much, so there’s nothing wrong with running through it, but I recommend skipping it since it doesn’t provide much help if you’ve already filled out the install page.
Step 3: Update to Latest Version (if necessary)
This step can seem strange, since you just installed WordPress. Shouldn’t it be up-to-date already?
WordPress updates its application often, and every time they do every plugin and installer must check that their software is compatible with the changes. Usually everything still works fine, but they need to check. So, if an update came out recently, you may be asked to update your brand-new install. This is fine. You don’t have any posts or anything on your site yet, so don’t worry about backing up your database.

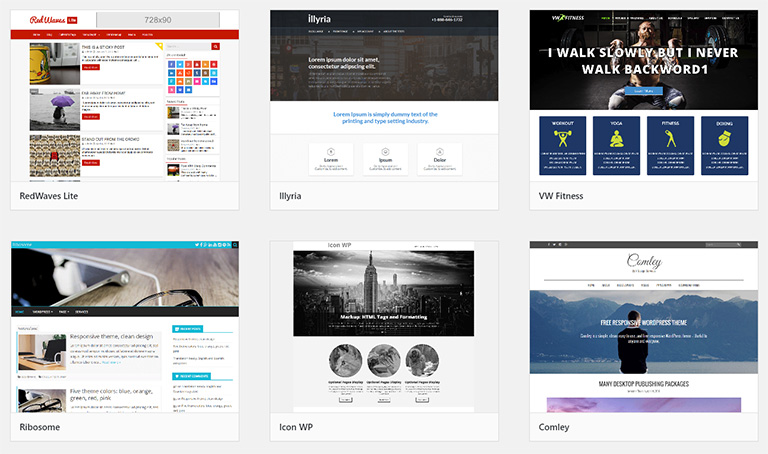
Step 4: Choose a Theme
Now is the part where you start to really customize your site. What will it look like?
There are many Free Themes and Premium Themes out there to choose from. You should know before you choose a theme that there is more than just fonts and colors at work with these themes.
Some themes turn your site in to a slideshow or one-page website.
Some themes are designed for blog content, while others make your WordPress site look like a business website.
Some themes (usually Premium Themes) include several plugins that control the layout and functionality of WordPress.
Some themes (usually Premium Themes) require you to download and install demo content before you can get the look you saw on their sale page.
I recommend that you start with a simple theme—one without extra plugins—so that you can get your blog started sooner rather than later.
There are many quality Free Themes at WordPress.org.
A very simple, but beautiful blog theme I like is Kale.
Advanced: If you will be making changes to your theme, you will need to make a child theme so that all your changes are not lost when you update your theme. This is a good tutorial for how to create a child theme.
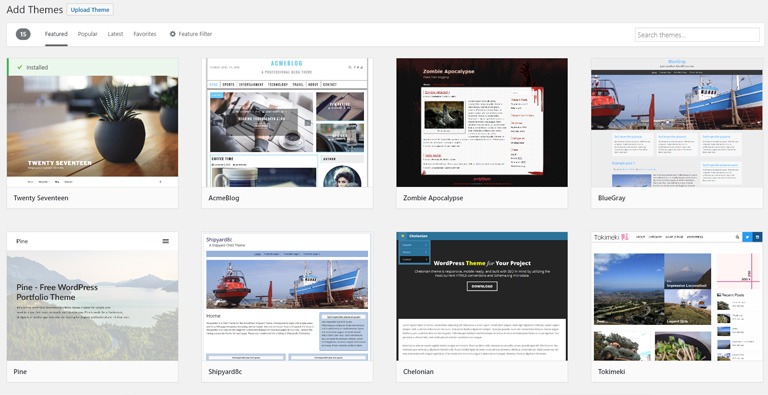
Installing and Activating a Theme
Themes can be found in the left menu of your WordPress Admin under Appearance > Themes. You should see a few already there: the defaults from WordPress. You could just keep one of these, but these are the same themes installed with EVERY INSTALL OF WORDPRESS. Let’s be a little more creative, shall we?
Click the Add New button at the top, and you will see a selection of free themes. You can filter these by features, like number of columns, menu types, and genre (e.g. Food, Education). Pick one you think will work and click its Preview button to see more of how it will look on your site. If you like it, click the Install button. This will take you back to the Themes page, where you can Activate your new theme.
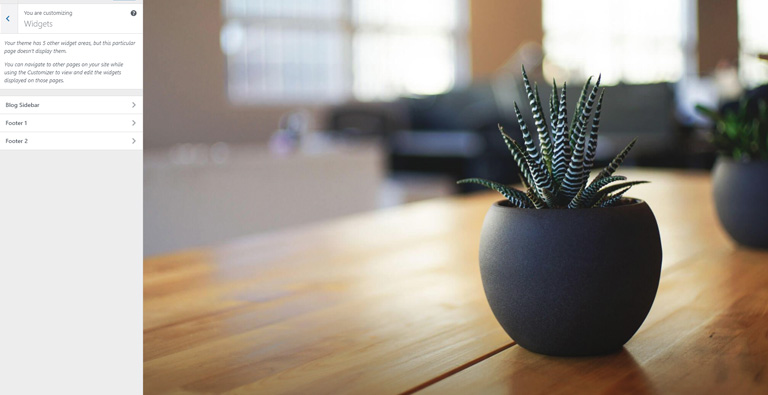
Most themes need some customization to work for your site, so choose Appearance > Customize from the left menu. You will see a live preview of your changes as you customize, but be sure to save your changes when you’re done!
When you’re done customizing, view your site live with the new Theme installed by rolling your cursor over the name of your site on the top left (next to the house icon) and clicking View Site.
Step 5: Settings for Comments and permalinks
Before you start posting, you should set WordPress to behave the way you want it to regarding permalinks.
What are Permalinks?
Permalinks are the way your URLs will appear in the browser. Take a second to make this look the way you want, or you will regret it later, as it gets messy once you have posts and pages. Choose Settings > Permalinks from the Admin menu.
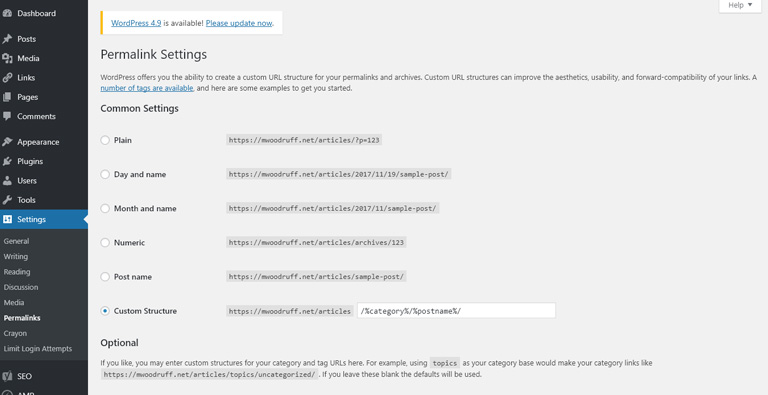
The default settings include Post ID numbers and month of postings. These are not pretty, and are less SEO-friendly. My favorite is the Custom setting of /%category%/%postname%/. This give you a nice, human-readable URL display like “https://www.mysite.com/recipes/best-crepes-ever/” instead of “https://www.mysite.com/?p=243”.
Step 6: Start posting!
You’re ready to start writing content!
Pages vs. Posts
Pages and posts are both very similar, but you should think of them differently.
Pages are for permanent, evergreen, and site-level content. A page is ideal for your About Us and Privacy Policy pages (FYI: these are required if you plan on using AdSense on your site!), and anything about your general business. If your website were a magazine, Pages would be for your masthead. If your site is not going to be a blog, all of your content should be in Pages.
Posts are for ongoing content that updates regularly. If your website were a magazine, posts would be the articles.
Step 7: Next Steps
WordPress provides a way to quickly get yourself online, but you do need to maintain your new site to make sure it stays just yours. WordPress sites now comprise over 25% of the internet, and that means the folks that hack website will get the biggest bang for their buck if they hack WordPress. To keep your site safe from malware and takeovers, keep your themes, plugins, and especially WordPress itself up-to-date.
If you change your content often, be sure to backup your site periodically. You can use a plugin or your hosting company’s services. If you don’t change your site often, just back it up when you make big changes.
There’s so much more you can do with your blog, but you’re in a good starting point. Once you’ve got your site up and running, be sure to check out these other great tutorials and guides to get the most out of your new website:
- Create a Child Theme
- Add SSL to your WordPress Site with Cloudflare’s Plugin
- The Absolute Beginner’s Guide to Google Analytics
- Managing Comments in WordPress
I hope this tutorial helps you get your website started. Welcome to the world of website building!