
Plaid provides a simple method for IBV, or Instant Bank Verification. By integrating Plaid into your app or website, your customers can use their online banking usernames and passwords to give you secure, tokenized access to their bank account. With that access, you can verify their identity, check their balance, or take a look at their transactions, all without storing their sensitive account details on your server.
Plaid + PHP
When starting out with Plaid, I found it difficult to find good references for using it with PHP. The recommended libraries offered were for Ruby, Node JS, and other platforms requiring changing my server configuration and downloading 2.4 bazillion packages. Even the Community, but not “approved,” PHP libraries on Plaid’s site were rife with dependencies. Call me old fashioned, but I enjoy the simplicity of the Apache/PHP setup for creating and running websites, so I set to getting Plaid working in my environment.
The steps to using Plaid’s API are:
Setup your Endpoints and Keys
You will need to create a Plaid account, and in their (very sparse) dashboard, you will find your keys.
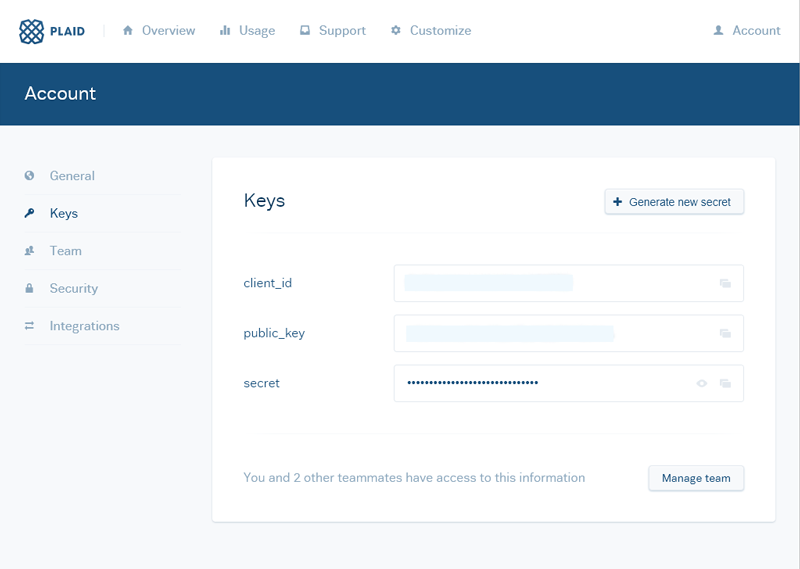
One cool thing about Plaid’s environments is that you never need to change your keys–just your endpoints. So, along with those keys in your config file, you will need to include the correct environment to use. Since we’ll be testing here, we’ll use the sandbox endpoint.
//Plaid-Sandbox
$plaid_env = 'sandbox';
$plaid_client_id = "[[YOUR PLAID CLIENT ID]]";
$plaid_public = "[[YOUR PLAID PUBLIC KEY]]";
$plaid_secret = "[[YOUR PLAID SECRET]]";
$plaid_url = "https://sandbox.plaid.com";
Create an Item
In Plaid, an Item is the Object that contains everything about the accounts for one customer at one financial institution. If you have a customer that uses your Plaid integration, an Item will be everything about that customer’s banking data that you have access to, including transactions.
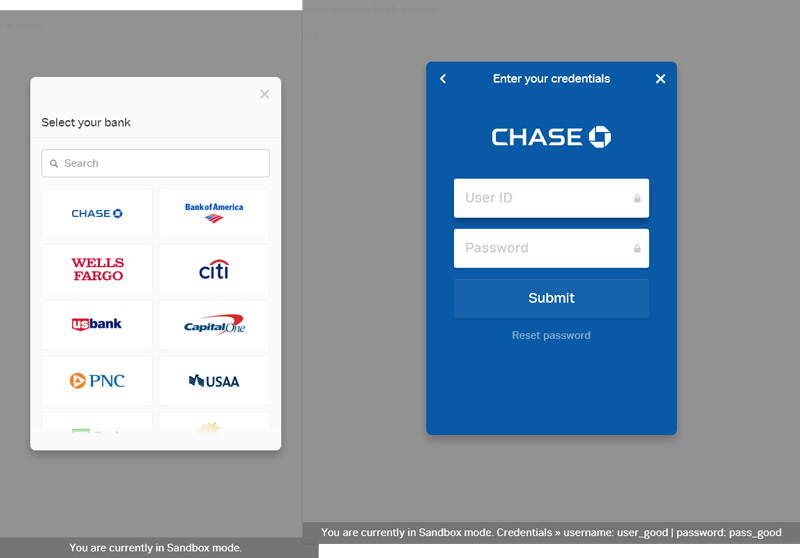
When using the Sandbox endpoint, Plaid displays the test credentials that give you a positive result (see the image below, at the bottom of each screen). This is especially helpful if you have other folks testing your implementation. For other testing scenarios, they have a way to generate any error you’re looking for in the docs.
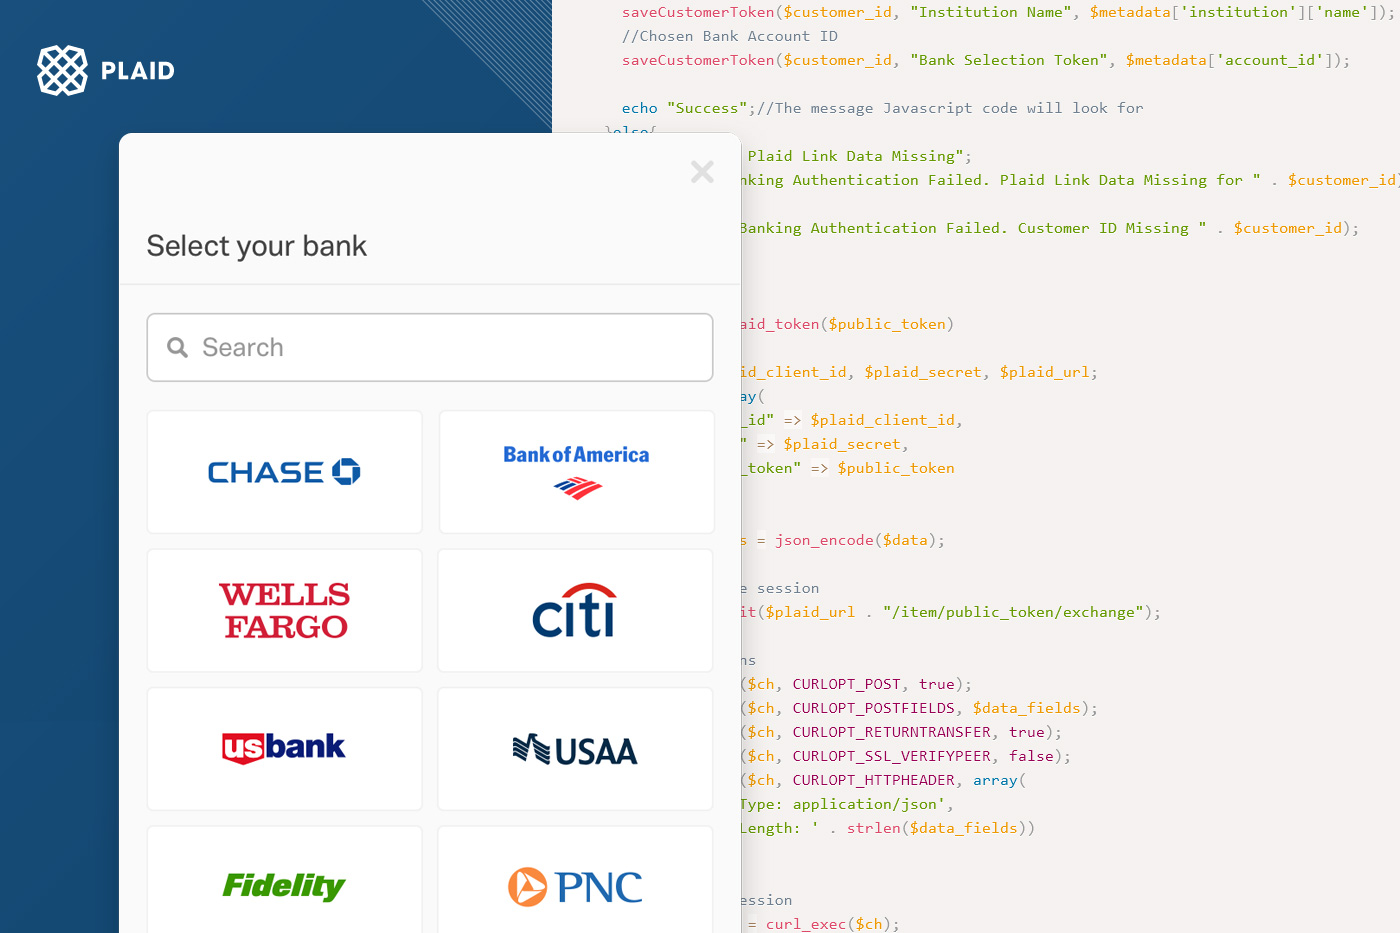
Plaid uses a bit of Javascript to serve their front-end module to your customers. This has some benefits and detriments:
| Pros |
| You don’t have to code every bank logo and name into the interface. |
| It looks pretty slick, and each major bank’s branding is there, which should help your customers feel more comfortable divulging their credentials. |
| You can customize the text on the front end (N.B. This is new as of July 11, 2017). |
| Cons |
| The customizable text is your-account-wide, meaning you can’t have two versions on your site. |
| It may not match the look & feel of the page you want to use it on. |
| If a customer cannot find their bank, you have to rely on your language on the interface to get them back to the page you control. There’s no error from Plaid on this event, so knowing just how many of your customers do not find their bank is impossible, and there’s no way to direct them right away to using another method of bank verification, like providing their Bank Account ID and Routing number. |
To implement on your page, first include the library between the HEAD tags:
<script src="https://cdn.plaid.com/link/v2/stable/link-initialize.js"></script>
Also in the HEAD section, use Javascript to trigger the Plaid module. I’m using jQuery here.
$(document).ready(function() {
  // Trigger the standard Institution Select view
  document.getElementById('linkButton').onclick = function() {
    linkHandler.open();
  };
});
Near the end of your page, include the integration Javascript for initiating the Plaid module. Here, you can identify some settings for the interface, such as what aspects of the Item you want access to (Auth, Identity, etc.) and limiting choices to specific banks. Be sure to set selectAccount: true if you will be using the Plaid token with Stripe or other payment gateway.
var linkHandler = Plaid.create({
    selectAccount: true,
    env: '',
    apiVersion: 'v2',
    clientName: 'Client Name',
    key: '',
    product: ['auth', 'transactions', 'identity'],
    webhook: 'https://myurl.com/webhooks/p_responses.php'
Finally, add the button link that you want a customer to click to open the Plaid module.
<button id="linkButton">Link Your Bank Account</button>
To test, open the page and click the button. You should see the Plaid module take over the page and ask you to select your bank. If not, check your console (in Chrome, F12) for error messages from Plaid.
Process Your Item
Using an AJAX post, use the data returned to POST to a page on your server finalize the Plaid authentication.
    onSuccess: function(public_token, metadata) {
    // The onSuccess function is called when the user has successfully
    // authenticated and selected an account to use.

      $.post( 'process_plaid_token.php', {pt:public_token,md:metadata,id:""}, function( data ) {
          console.log("data : "+data);
           if (data=="Success"){
              console.log("Success");
              window.location.replace("thankyou.php");//Let users know the process was successful
           }else{
             console.log("Error");
             window.location.replace("error.php");//Let users know the process failed
           }
        });
    },
On the server side, in this case in process_plaid_token.php, you need to save the Access Token and Item ID in your DB. The Access Token is for accessing Transactions and other Item data, and the Item ID will be used to identify the Item to which a Webhook refers. Without a saved Item ID, your webhooks are SOL, so don’t skip this!
To get these important pieces of information, you need to exchange your public token posted from Javascript (which will expire in 30 minutes) for an access token (which will not expire).
  //Exchange public token for Plaid access_token
   $plaid_token = get_plaid_token($_POST['pt']);
...

    function get_plaid_token($public_token)
    {
        global $plaid_client_id, $plaid_secret, $plaid_url;
        $data = array(
            "client_id" => $plaid_client_id,
            "secret" => $plaid_secret,
            "public_token" => $public_token
        );

        $data_fields = json_encode($data);

        //initialize session
        $ch=curl_init($plaid_url . "/item/public_token/exchange");

        //set options
        curl_setopt($ch, CURLOPT_POST, true);
        curl_setopt($ch, CURLOPT_POSTFIELDS, $data_fields);
        curl_setopt($ch, CURLOPT_RETURNTRANSFER, true);
        curl_setopt($ch, CURLOPT_SSL_VERIFYPEER, false);
        curl_setopt($ch, CURLOPT_HTTPHEADER, array(
          'Content-Type: application/json',
          'Content-Length: ' . strlen($data_fields))
        );

        //execute session
        $token_json = curl_exec($ch);
        $exchange_token = json_decode($token_json,true);
        //close session
        curl_close($ch);

        return $exchange_token;
    }
Another helpful piece of info to associate with your customer is their chosen bank account, if you have them select one. You will have access to ALL bank accounts on their Item, but if your terms of service are specific, you should limit your data to that one account.
//---------------------------------------------------------------------------Save your tokens and IDs
//Plaid Access Token
      saveCustomerToken($customer_id, "Plaid Access Token", $plaid_token["access_token"]);
      //Item ID
      saveCustomerToken($customer_id, "Item ID", $plaid_token['item_id']);
        //Institution ID
      saveCustomerToken($customer_id, "Institution ID", $metadata['institution']['institution_id']);
      //Institution Name
      saveCustomerToken($customer_id, "Institution Name", $metadata['institution']['name']);
      //Chosen Bank Account ID
      saveCustomerToken($customer_id, "Bank Selection Token", $metadata['account_id']);
...
function saveCustomerToken($customer_id, $token_type, $token){

    //TODO Save to your Database
    error_log("Customer ID: " . $customer_id . $token_type . ": " . $token);

}
If you are integrating with another service, like Stripe or Dwolla, this a good time to do it, since you need to use the Plaid public token before it expires.
If everything went as planned, our data (simply printing to our error log in this example) looks like this:
Customer ID: XX Institution ID: ins_1
Customer ID: Institution Name: Bank of America
Customer ID: Bank Selection Token: EmnlkNOTAREALBANKTOKEN5MNNB
Customer ID: Plaid Access Token: access-sandbox-umn0p3-a000-0000-0000-e00000000e000,
Customer ID: Item ID: jykrNOTAREALPLAIDITEMIDE67b
Accept Webhooks
You may be inclined to skip this part “for later,” but I recommend you do not. Plaid really expects you to use Webhooks to keep your data updated, and pulling data from them can be slow at times due to the many bank systems they need to connect with. Relying on just-in-time content from them is not sustainable at testing levels, let alone at scale. You should plan to use their webhooks to let you know when to update, and you will have a faster, but still up-to-date system.
The URL of your webhook should have been included in your Javascript when you initiated an Item. When you create that file to accept the webhooks, you can consume the webhook data like so:
  $payload = @file_get_contents("php://input");
  $event=json_decode($payload,true);
  // Do something with $event

  // This checks for the specific Webhook Code that says bank data is ready
  if($event['webhook_code']=="DEFAULT_UPDATE"){
    //TODO: Find customer ID by Plaid Item ID in $event['item_id']
    //TODO: Notify admin that this bank data is ready
  }

  http_response_code(200);//let Plaid know you received the webhook
You can see all the possible webhook values at Plaid.com.
Use the Data
Now that you have a test Item and its matching access token, you can use the Plaid data. Use your webhooks to tell you when to make these pulls using cURL.
Balance
Visit Plaid.com to see the full data the call below can return.
        $data = array(
            "client_id" => $plaid_client_id,
            "secret" => $plaid_secret,
            "access_token"=>$access_token
        );
        $data_fields = json_encode($data);

        //initialize session
        $ch=curl_init($plaid_url . "/accounts/balance/get");

        //set options
        curl_setopt($ch, CURLOPT_POST, true);
        curl_setopt($ch, CURLOPT_POSTFIELDS, $data_fields);
        curl_setopt($ch, CURLOPT_RETURNTRANSFER, true);
        curl_setopt($ch, CURLOPT_SSL_VERIFYPEER, false);
        curl_setopt($ch, CURLOPT_HTTPHEADER, array(
          'Content-Type: application/json',
          'Content-Length: ' . strlen($data_fields))
        );

        //execute session
        $balance_json = curl_exec($ch);
        $balance = json_decode($balance_json,true);
        //check for errors
        if(isset($balance['error_code'])){
          error_log("Plaid Error Message: " . $balance_json);
        }
        //close session
        curl_close($ch);
Access any of the data below using the same format for your cURL calls, but change the endpoint URL to Plaid.
Identity
Get contact info for the bank account holder, which is helpful for verifying a customer is who they say they are. Identity Documentation
$ch=curl_init($plaid_url . "/identity/get");
Transactions
Retrieve individual transactions for each account, for all account types and transaction types. Transaction Documentation
$ch=curl_init($plaid_url . "/transactions/get");
Income
If your application requires only income information, use this endpoint to get you the results of Plaid’s calculations. Income Documentation
$ch=curl_init($plaid_url . "/income/get");
Next Steps
Changing Endpoints
When you’re ready to move onto the Development endpoint, which allows you to use REAL bank credentials and, basically, do everything the Production endpoint can do except for free, you will need to contact Plaid Sales. I found their disclosure of this information lacking, and was very frustrated until I found it noted on a message board.
In Development, you can see real data for customers, or just for testing, for 100 Items. You will need a contract agreeing to payment terms before you can go to Production, so once you have the Sandbox testing done, it makes sense to get the negotiations going and make sure the pricing is worth it for your application.
Further Integration, Error Checking, Etc.
Inevitably, your customers will change their passwords for their banks. You will need to give them a way to easily reauthorize your application, and Plaid has a way to do that. They also have ways to use their banking tokens for connections to payment gateways like Stripe and Dwolla. I recommend heading over to Plaid’s Documentation to continue reading about everything you can do with their developer-friendly banking product.
Full Plaid Link Code
The PHP page that calls Plaid’s module–be sure to insert your own Plaid keys.
 <script src="https://cdn.plaid.com/link/v2/stable/link-initialize.js"></script>
  <script src="https://code.jquery.com/jquery-3.2.1.min.js" integrity="sha256-hwg4gsxgFZhOsEEamdOYGBf13FyQuiTwlAQgxVSNgt4=" crossorigin="anonymous"></script>

  <script type="text/javascript">

$(document).ready(function() {
  // Trigger the standard Institution Select view
  document.getElementById('linkButton').onclick = function() {
    linkHandler.open();
  };
});

  </script>

Please link your <strong>primary bank account</strong>.
<button id="linkButton">Link Your Bank Account</button>

  <script>
  var linkHandler = Plaid.create({
    selectAccount: true,
    env: '<?php echo $plaid_env ?>',
    apiVersion: 'v2',
    clientName: 'Client Name',
    key: '<?php echo $plaid_public ?>',
    product: ['auth', 'transactions', 'identity'],
    webhook: 'https://myurl.com/webhooks/p_responses.php',
    onLoad: function() {
      // The Link module finished loading.
    },
    onSuccess: function(public_token, metadata) {
    // The onSuccess function is called when the user has successfully
    // authenticated and selected an account to use.

      $.post( 'process_plaid_token.php', {pt:public_token,md:metadata,id:"<?php echo $customer_id?>"}, function( data ) {
          console.log("data : "+data);
           if (data=="Success"){
              console.log("Success");
              window.location.replace("thankyou.php");//Let users know the process was successful
           }else{
             console.log("Error");
             window.location.replace("error.php");//Let users know the process failed
           }
        });
    },
    onExit: function(err, metadata) {
      // The user exited the Link flow. This is not an Error, so much as a user-directed exit
      if (err != null) {
        console.log(err);
        console.log(metadata);
      }
    },
  });
  </script>
Server-side token processing page.
<?php
error_reporting(E_ALL);
ini_set('display_errors', 1);
  //Process Banking
  //Plaid-Sandbox  //N.B. This should not be used on the page like this!
  $plaid_env = 'sandbox';
  $plaid_client_id = "[[YOUR PLAID CLIENT ID]]";
  $plaid_public = "[[YOUR PLAID PUBLIC KEY]]";
  $plaid_secret = "[[YOUR PLAID SECRET]]";
  $plaid_url = "https://sandbox.plaid.com";

$error="";
if(!empty($_POST))
{
  if (isset($_POST['id'])){//This is our customer ID
    if((isset($_POST['pt']))&&(isset($_POST['md']))){
      $customer_id = $_POST['id'];
      $metadata = $_POST['md'];
      //Exchange public token for Plaid access_token
      $plaid_token = get_plaid_token($_POST['pt']);
      //---------------------------------------------------------------------------Save your tokens and IDs
      //Plaid Access Token
      saveCustomerToken($customer_id, "Plaid Access Token", $plaid_token["access_token"]);
      //Item ID
      saveCustomerToken($customer_id, "Item ID", $plaid_token['item_id']);
        //Institution ID
      saveCustomerToken($customer_id, "Institution ID", $metadata['institution']['institution_id']);
      //Institution Name
      saveCustomerToken($customer_id, "Institution Name", $metadata['institution']['name']);
      //Chosen Bank Account ID
      saveCustomerToken($customer_id, "Bank Selection Token", $metadata['account_id']);

      echo "Success";//The message Javascript code will look for
    }else{
      echo "Failed: Plaid Link Data Missing";
      error_log("Banking Authentication Failed. Plaid Link Data Missing for " . $customer_id);
    }
  }else error_log("Banking Authentication Failed. Customer ID Missing " . $customer_id);

}

    function get_plaid_token($public_token)
    {
        global $plaid_client_id, $plaid_secret, $plaid_url;
        $data = array(
            "client_id" =--> $plaid_client_id,
            "secret" => $plaid_secret,
            "public_token" => $public_token
        );

        $data_fields = json_encode($data);

        //initialize session
        $ch=curl_init($plaid_url . "/item/public_token/exchange");

        //set options
        curl_setopt($ch, CURLOPT_POST, true);
        curl_setopt($ch, CURLOPT_POSTFIELDS, $data_fields);
        curl_setopt($ch, CURLOPT_RETURNTRANSFER, true);
        curl_setopt($ch, CURLOPT_SSL_VERIFYPEER, false);
        curl_setopt($ch, CURLOPT_HTTPHEADER, array(
          'Content-Type: application/json',
          'Content-Length: ' . strlen($data_fields))
        );

        //execute session
        $token_json = curl_exec($ch);
        $exchange_token = json_decode($token_json,true);
        //close session
        curl_close($ch);

        return $exchange_token;
    }

function saveCustomerToken($customer_id, $token_type, $token){

    //TODO Save to your Database
    error_log("Customer ID: " . $customer_id . $token_type . ": " . $token);

}

?>